Note: This document only apply to BulletProof Gateway, does not apply to PayFac gateway.
1= Enter in your Bulletproof Gateway admin panel, and click on “Settings”

2= Click on “Webhooks”
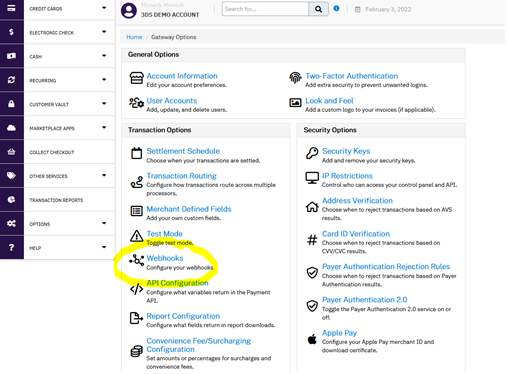
Note: If in your admin panel the option “Webhook” is not been displayed, then check if your user name (in the “User Account” option) in the admin has enabled the option “Manage Webhook Configuration”

3) Click on “Create” ![]()
4) In the field “URL” copy a link like this https://yourstorename.com/wp-content/plugins/bpcheckout/Views/webhook.php (replace yourstorename.com with the merchant site url) . ![]()
Note1: if the merchant has installed WordPress in a subfolder the url will be like this:
https://yourstorename.com/subfoldername/wp-content/plugins/bpcheckout/Views/webhook.ph
Note 2: In the Bulletproof Checkout Plug, you can enter in the menu Settings and click on “External Webhooks” and will display the webhook URL created dynamically for the merchant site. (you can copy-paste from there)
5) By default a list with Available Events will appear at left side, and also a empty list with Subscribed Events will be on the right side, move (drag and drop or click over each blue arrow and move all available events from the left list to the right list.
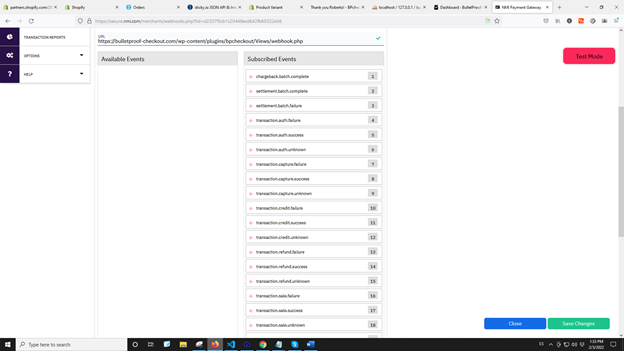
6) After all events are under “subscribed Events” column click on “Save” ![]()
7) Then will be created a Webhook Signing Key , please copy this Signing Key to the Bulletproof Checkout Settings![]()